如何愉快地在Mac上刷朋友圈
事出有因
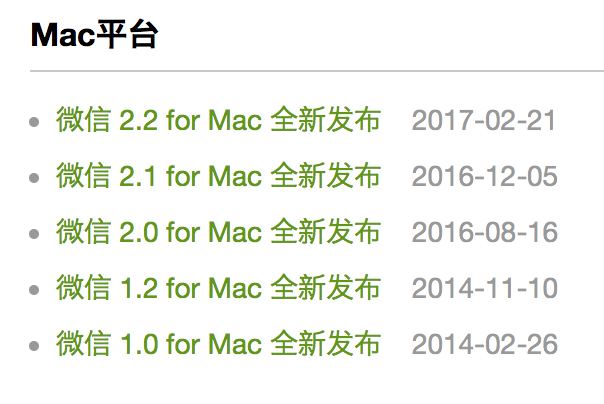
从前,有一款Mac软件,在2014.11.10发布了1.2版本,然后就没有然后了。 可能这期间,Mac微信开发组解散了又重建,解散了又重建。。。直到2016.08.16,它终于发布了2.0版本,这就是Mac微信。
不可否认,它越来越好用,但它应该可以更好用。例如,对于朋友圈重度用户,在Mac上使用微信聊天之余,浏览下朋友圈,想来也是极好的。
也是早在2.0版本,我发现了Mac微信中已经存在朋友圈相关网络接口代码,没想到半年多过去了,它还是这副死样。俗话说得好,自己动手,丰衣足食,干!!!
注:接下来内容涉及修改微信,相关代码纯属技术研究与爱好,请大家尊重腾讯公司对微信软件的知识产权,不要乱来。
厉兵秣马
要想工作做得好,前期基础要打好!
1. 与iOS类似,Mac上的hook也是以注入动态库的方式实现的。Xcode提供了动态库的模版,我们只需要简单的几行脚本就可以实现注入动态库。
选择Build Phases->New Run Script Phase
#!/bin/bash
app_name="WeChat"
framework_name="MacWeChatTimeLinePlugin"

app_bundle_path="/Applications/${app_name}.app/Contents/MacOS"
app_executable_path="${app_bundle_path}/${app_name}"
app_executable_backup_path="${app_executable_path}_"
framework_path="${app_bundle_path}/${framework_name}.framework"

# 备份WeChat原始可执行文件
if [ ! -f "$app_executable_backup_path" ]
then
	cp "$app_executable_path" "$app_executable_backup_path"
fi

cp -r "${BUILT_PRODUCTS_DIR}/${framework_name}.framework" ${app_bundle_path}

insert_dylib --all-yes "${framework_path}/${framework_name}" "$app_executable_backup_path" "$app_executable_path"
2.编辑Scheme,选择executable为WeChat.app
3.编辑Podfile
platform :osx, '10.10'

target 'MacWeChatTimeLinePlugin' do
    pod 'JRSwizzle', '~> 1.0'
end
4.宏定义
#define CBGetClass(classname) objc_getClass(#classname)
#define CBRegisterClass(superclassname, subclassname) { Class class = objc_allocateClassPair(CBGetClass(superclassname), #subclassname, 0);objc_registerClassPair(class); }
#define CBHookInstanceMethod(classname, ori_sel, new_sel) { NSError *error; [CBGetClass(classname) jr_swizzleMethod:ori_sel withMethod:new_sel error:&error]; if(error) NSLog(@"%@", error); }
#define CBHookClassMethod(classname, ori_sel, new_sel) { NSError *error; [CBGetClass(classname) jr_swizzleClassMethod:ori_sel withClassMethod:new_sel error:&error]; if(error) NSLog(@"%@", error); }
#define CBGetInstanceValue(obj, valuename) object_getIvar(obj, class_getInstanceVariable([obj class], #valuename))
#define CBSetInstanceValue(obj, valuename, value) object_setIvar(obj, class_getInstanceVariable([obj class], #valuename), value)
如此一来,基础工作就做好了,现在按下Command+R, 就能debug注入了插件的微信了。
知己知彼
在实现Mac端朋友圈前,先看看iOS端是怎么实现的。怎么看呢?
从UI入手,我们知道,iOS上实现下拉刷新,是通过检测tableView的scrollOffest来实现的,很容易就发现了调用链。
-[WCTimeLineViewController scrollViewDidEndDragging:willDecelerate:]
	-[EGORefreshTableHeaderView egoRefreshScrollViewDidEndDragging:]
		-[WCTimeLineViewController refreshHead]
			-[WCFacade updateTimelineHead]
				-[WCTimelineMgr updateDataHead:0]
					-[WCTimelineDataProvider updateWithReferID:LatestID:]
-[WCTimelineDataProvider requestForSnsTimeLineRequest:minID:lastRequestTime:]进入-[WCTimelineDataProvider requestForSnsTimeLineRequest:minID:lastRequestTime:]
可以看到,朋友圈的刷新是通过创建SnsTimeLineRequest,然后监听请求响应进行下一步处理、显示。
那么,要实现在Mac上刷朋友圈的目的,最基础也是最重要的,就是要发送SnsTimeLineRequest,然后监听SnsTimeLineResponse。
那么,Mac端微信是怎么创建请求,然后监听响应的呢。
我在-[GetCDNDnsRequest init]下了个断点
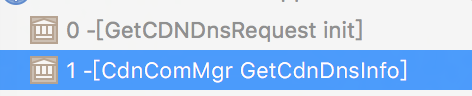
之后在-[CdnComMgr GetCdnDnsInfo]中可以看到,大概发网络请求的流程是
GetCDNDnsRequest *request = [[GetCDNDnsRequest alloc] init];
request.baseRequest = [MMCGIRequestUtil InitBaseRequestWithScene:0x0];
MMCGIWrap *cgiWrap = [[MMCGIWrap alloc] init];
[cgiWrap setM_requestPb:request];
[cgiWrap setM_functionId:0x*];
[[[MMServiceCenter defaultCenter] getService:[MMCGIService class] RequestCGI: cgiWrap delegate:self];
剩下的就是在iOS中确认SnsTimeLineRequest的参数了。
一鼓作气
万事俱备,只欠东风!
@interface MMTimeLineMgr () <MMCGIDelegate, MMService>

@end

- (void)updateTimeLineHead {
    SnsTimeLineRequest *request = [[CBGetClass(SnsTimeLineRequest) alloc] init];
    request.baseRequest = [CBGetClass(MMCGIRequestUtil) InitBaseRequestWithScene:0];
    request.clientLatestId = 0;
    request.firstPageMd5 = @"";
    request.lastRequestTime = 0;
    request.maxId = 0;
    request.minFilterId = 0;

    MMCGIWrap *cgiWrap = [[CBGetClass(MMCGIWrap) alloc] init];
    cgiWrap.m_requestPb = request;
    cgiWrap.m_functionId = 211;

    MMCGIService *cgiService = [[CBGetClass(MMServiceCenter) defaultCenter] getService:CBGetClass(MMCGIService)];
    NSUInteger sessionId = [cgiService RequestCGI:cgiWrap delegate:self];
    NSLog(@"%lu", (unsigned long)sessionId);
}

- (void)OnResponseCGI:(BOOL)arg1 sessionId:(unsigned int)arg2 cgiWrap:(id)arg3 {
    NSLog(@"%d %d %@", arg1, arg2, arg3);
}

@end
Command + R !!!
满怀希望,按下两个键,结果。。。sessionId为0!!!
进入-[MMCGIService RequestCGI:delegate:] 可以看到,开始请求前需要从MMCGIConfig找到对应的MMCGIItem,很明显,找不到。没关系,照猫画虎,给它new一个就是了。
@implementation NSObject (MacWeChatTimeLinePlugin)
#pragma mark - MMCGIConfig
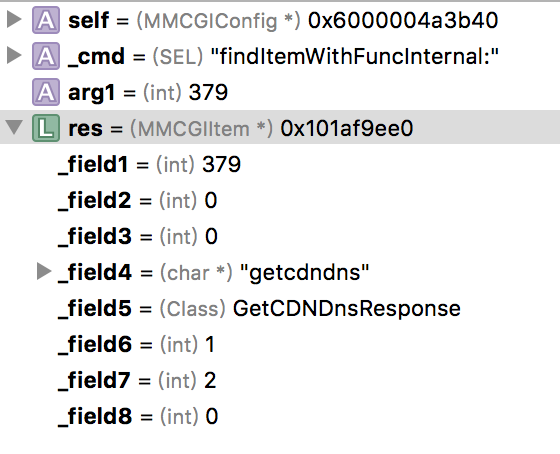
- (const struct MMCGIItem *)cb_findItemWithFuncInternal:(int)arg1 {
struct MMCGIItem *res = [self cb_findItemWithFuncInternal:arg1];
if (arg1 == 211) {
res = malloc(sizeof(struct MMCGIItem));
res->_field1 = 211;
res->_field2 = 0;
res->_field3 = 0;
res->_field4 = "mmsnstimeline";
res->_field5 = CBGetClass(SnsTimeLineResponse);
res->_field6 = 1;
res->_field7 = 2;
res->_field8 = 0;
}
return res;
}
@end
static void __attribute__((constructor)) initialize(void) {
NSLog(@"++++++++ MacWeChatTimeLinePlugin loaded ++++++++");
CBHookInstanceMethod(MMCGIConfig, @selector(findItemWithFuncInternal:), @selector(cb_findItemWithFuncInternal:));
}打断点在-[MMTimeLineMgr OnResponseCGI:sessionId:cgiWrap:]
成功了, 在SnsTimeLineResponse的mutableObjectListList可以看到有10条朋友圈数据,接下来就是将数据处理,显示出来的工作了。
效果图
原文链接:如何愉快地在Mac上刷朋友圈